
How To
Easily Send to a Recipient Based on a Drop-down Choice
Contact Form 7 is brilliant for most contact forms, but what happens when you need emails to go to different people depending on what your visitor selects? Maybe you’ve got multiple locations, different departments, or various team members handling specific enquiries.
Here’s how to set up smart email routing that sends messages exactly where they need to go – automatically.
Step 1: Create your basic contact form
Contact Form 7 comes set up with several fields straight out of the box, but you can customise them to suit your needs. For this example, I’ve set up:
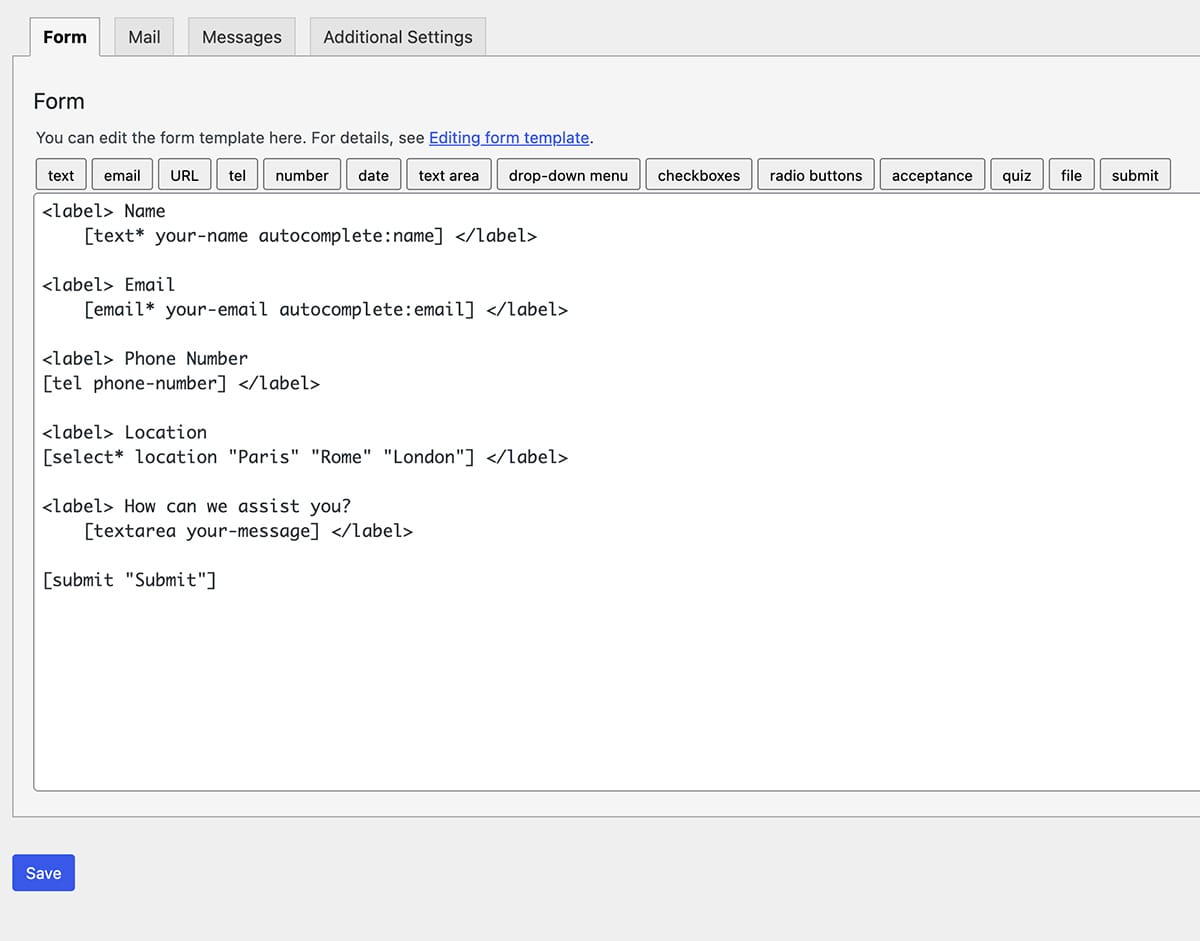
<label> Name
[text* your-name autocomplete:name] </label>
<label> Email
[email* your-email autocomplete:email] </label>
<label> Phone Number
[tel phone-number] </label>
<label> How can we assist you?
[textarea your-message] </label>
[submit “Submit”]
Step 2: Add the dropdown field
Now we’ll add the location dropdown. Position your cursor where you want it to appear (usually after your contact information fields but before the message field).
Click the dropdown menu button at the top of the content box. This opens the Drop-down menu form-tag generatorpopup.
Fill in the details:
- Field type: Drop-down menu ✓ This is a required field (tick this box)
- Field name: location
- Class attribute: (leave blank unless you need custom styling)
- Selectable values: Enter one item per line:
Paris
Rome
London
Click Insert Tag. Contact Form 7 will insert the dropdown code, but you’ll need to add a label manually:
<label>
Location [select* location “Paris” “Rome” “London”] </label>
This is how your form should look after adding the field:
<label> Name
[text* your-name autocomplete:name] </label>
<label> Email
[email* your-email autocomplete:email] </label>
<label> Phone Number
[tel phone-number] </label>
<label> Location
[select* location “Paris” “Rome” “London”] </label>
<label> How can we assist you?
[textarea your-message] </label>
[submit “Submit”]
Other examples of what you could use this for:
- Field name: department | Values: Sales, Support, Accounts
- Field name: contact_reason | Values: General enquiry, Technical support, Billing
- Field name: office | Values: Brisbane, Sydney, Melbourne
Step 3: Add the email routing magic
Now we need to edit your location dropdown to include the email addresses. Add email addresses after each location using the pipe symbol (|):
<label> Location
[select* location “Paris|[email protected]” “Rome|[email protected]” “London|[email protected]”]</abel>
This is the clever bit – visitors will only see “Paris”, “Rome”, “London” in the dropdown, but Contact Form 7 knows to send emails to the addresses after the | symbol.

Step 4: Complete your form
Once you’re happy that you have all the fields you need on your contact form, press Save and we can move onto making sure the email is going where you need it to.
Step 5: Configure the email routing
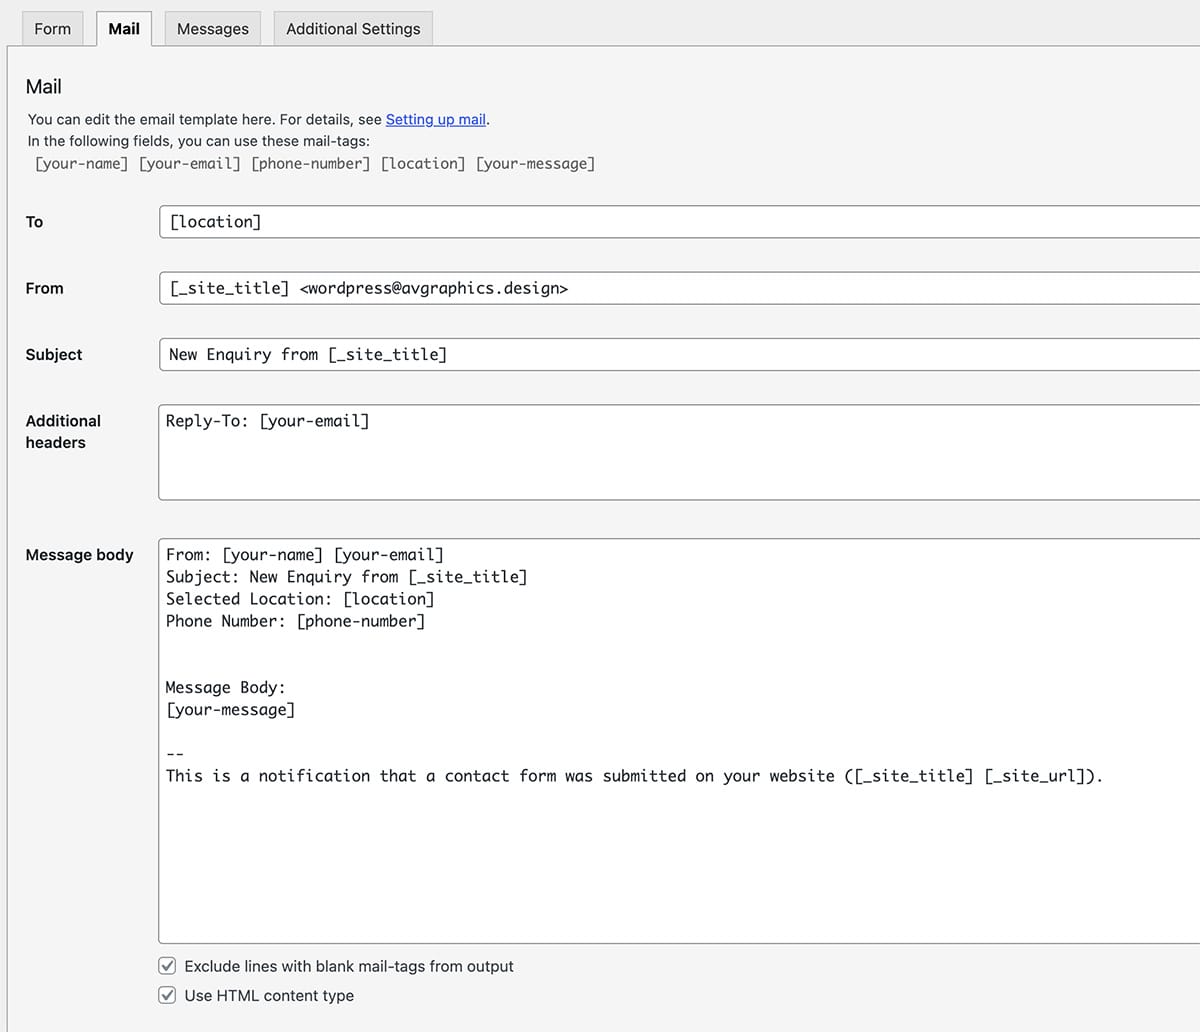
Click the Mail tab. This is where we make sure all the fields are going to be sent to the recipient.
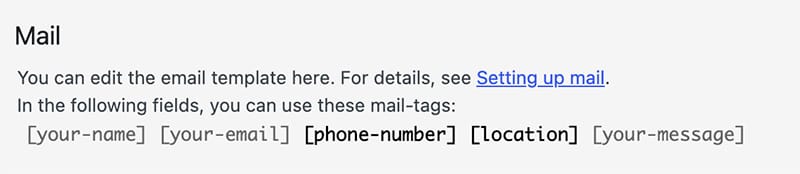
Contact Form 7 lists all your available mail-tags at the top of the panel.
In the To: field, replace the default email address with:
[location]
This tells Contact Form 7 to send the email to whichever location (and email address) the visitor selected from the dropdown.
You can also add the selected location to your message body to show which recipient was chosen. In the Message body field, add a line like:
Selected Location: [location]
This will show the email address in the message body for your reference.
Want to get fancy with your email formatting?
If you’re comfortable with HTML, you can style your email notifications to look more professional. Here’s an example using the fields from our form:
<h2 style="font-family:sans-serif;">You have a new Enquiry</h2>
<p style="font-family:sans-serif;">Someone has submitted an enquiry from the contact form on your website at <span style="color:#323b7b; font-weight:bold;">[_site_title]</span></p>
<div style="font-family:sans-serif;background-color: rgba(141, 152, 171, 0.3); padding: 15px 30px; margin-top:20px;">
    <h3>Contact Details</h3>
    <p style="font-family:sans-serif;font-size: 1rem;">Name: [your-name]</p>
    <p style="font-family:sans-serif;font-size: 1rem;">Email: [your-email]</p>
    <p style="font-family:sans-serif;font-size: 1rem;">Phone: [phone-number]</p>
    <p style="font-family:sans-serif;font-size: 1rem;">Selected Location: [location]</p>
    <hr>
    <h3 style="font-family:sans-serif;">Message Details</h3>
    <p style="font-family:sans-serif;">[your-message]</p>
</div>
Remember to tick Use HTML content type in the Mail settings if you use HTML formatting.
If you want to use this plugin yourself on your WordPress site you can find it here: Download Contact Form 7